[CI/CD Pipeline] 4. Advanced Jenkins
Delivery Pipeline 사용
Create a Pipeline
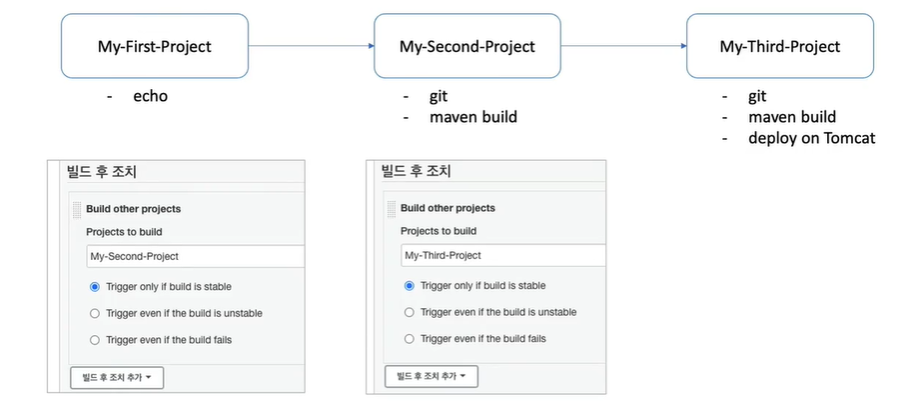
- My-First-Project
- 빌드 후 조치
- Build other projects: My-Second-Project
- 빌드 후 조치
- My-Second-Project
- 빌드 후 조치
- Build other projects: My-Third-Project
- 빌드 후 조치
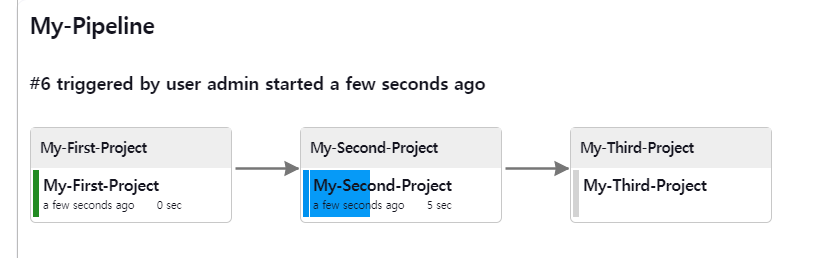
My-First-Project 가 성공적으로 수행된 후에 이어서 연쇄적으로 My-Second-Project, My-Third-Project 가 수행되는것을 확인할 수 있다.
위의 연쇄 작업을 Jenkins의 Pipeline Plugin을 추가해줌으로써 시각화할 수 있다.
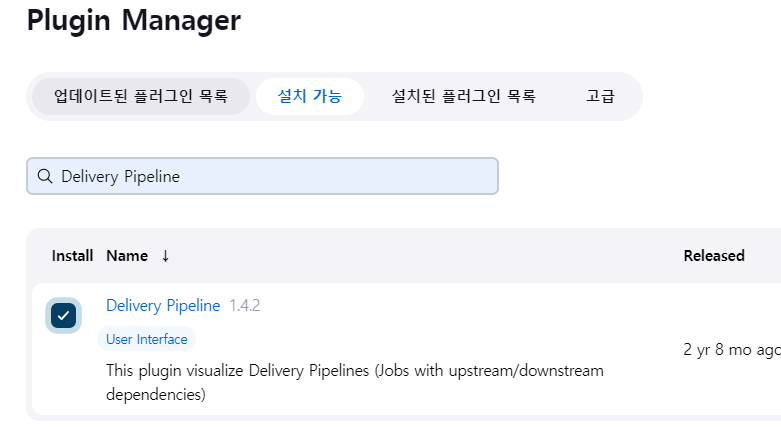
Delivery Pipeline
- Jenkins 관리 -> 플러그인 관리 -> 설치 가능 -> Delivery Pipeline
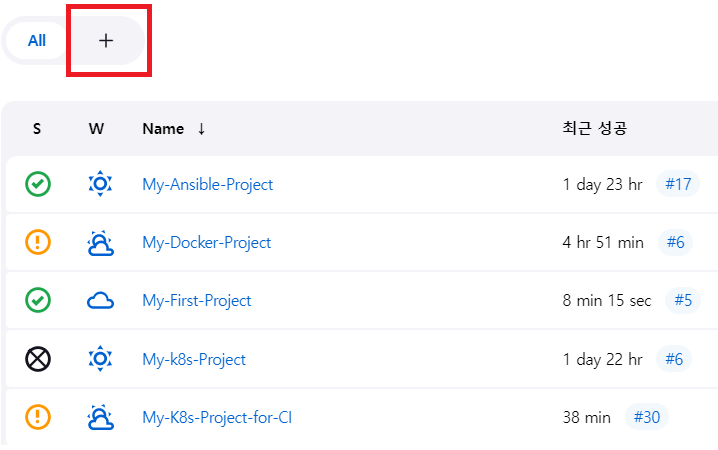
- 조회명: My-First-Pipeline-View
- Type: Delivery Pipeline View

결과
Jenkins Pipeline 스크립트 사용
Jenkins 에서 제공되는 Pipeline 이라는 프로젝트 타입에 대해서 알아보자.
현재까지 Item 이라는 프로젝트 타입에 빌드하고자하는 소스코드를 가져오고, 빌드 방식을 선택하고, 빌드 결과물을 배포하고자하는 서버를 구성했었다.
Pipeline 라는 프로젝트를 이용해서 좀 더 다이나믹하게 원하는 형태로 스크립트를 만들어서 제공하는 방식
Jenkins Pipeline
Jenkins Pipeline 프로젝트는 크게 2가지 형태로 작성할 수 있다.
- Declarative
- Scripted (Groovy + DSL)
- 차이점
- 시작 시 유효성 검사 유무
- 특정 Stage 실행 가능 여부 -> Declarative: 다음단계 진행 X, Scripted: 다음단계 진행 O
- 제어문
- Option
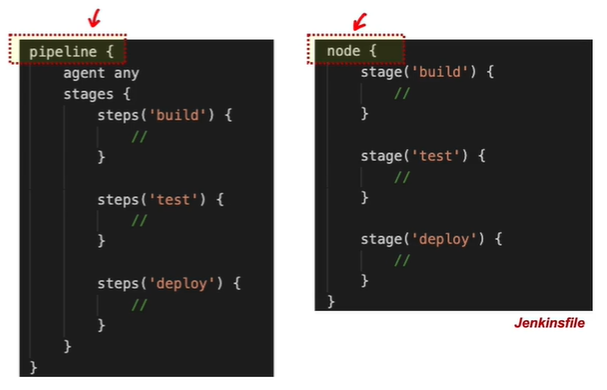
- pipeline: Declarative, node: Scripted
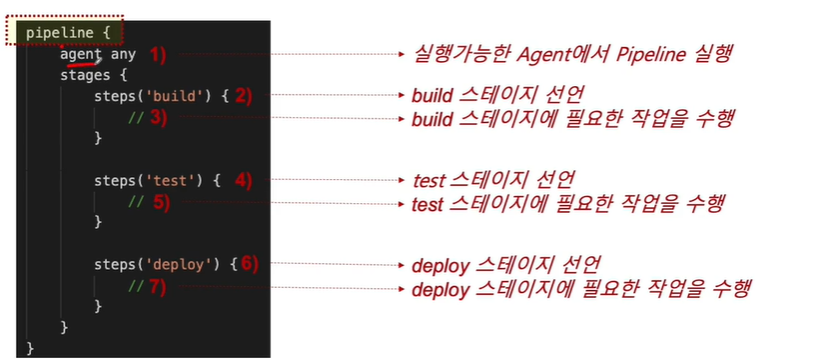
- agent: Jenkins 서버를 기동할 때, Master Server 와 Slave Server 로(Multi Node) 구성할 수 있는데, 어떤 서버에 Jenkins 를 실행할 것인지 지정하는 항목
- any: 구성되어 있는 Jenkins 서버들 중에 아무 서버에 Jenkins 를 실행하겠다.
- stage: 구성하고자하는 각각의 단계를 넣을 수 있다.
Declarative
Groovy script 없이 간단하게 시작
Jenkins Pipeline 생성하기
- Item name: My-First-Pipeline
- Pipeline: Pipeline Script
- script
pipeline {
    agent any
    stages {
        stage('Compile') {
            steps {
                echo "Compiled successfully!";
            }
        }

        stage('JUnit') {
            steps {
                echo "JUnit passed successfully!";
            }
        }

        stage('Code Analysis') {
            steps {
                echo "Code Analysis completed successfully!";
            }
        }

        stage('Deploy') {
            steps {
                echo "Deployed successfully!";
            }
        }
    }
}
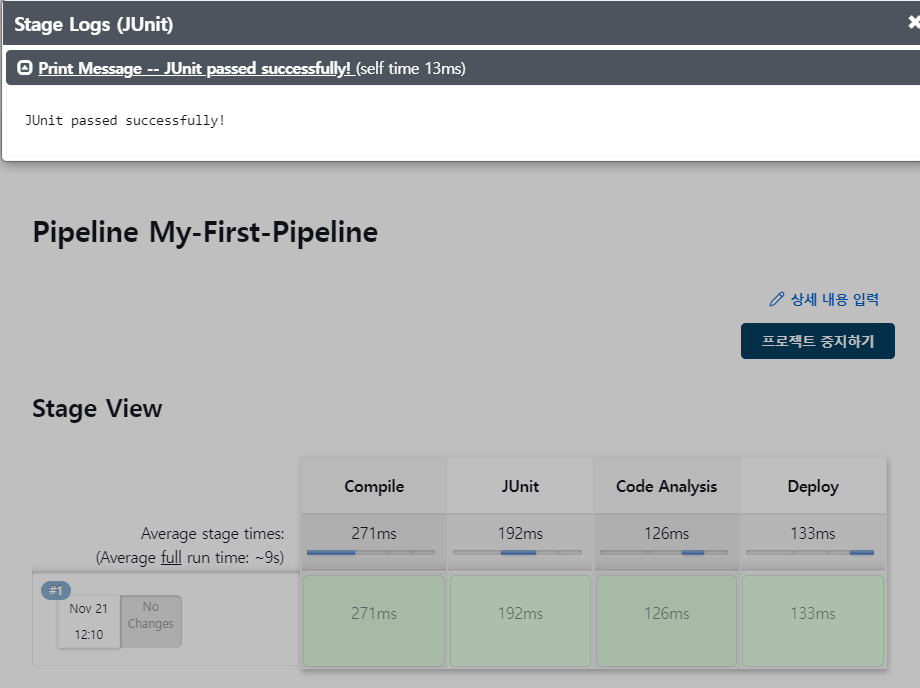
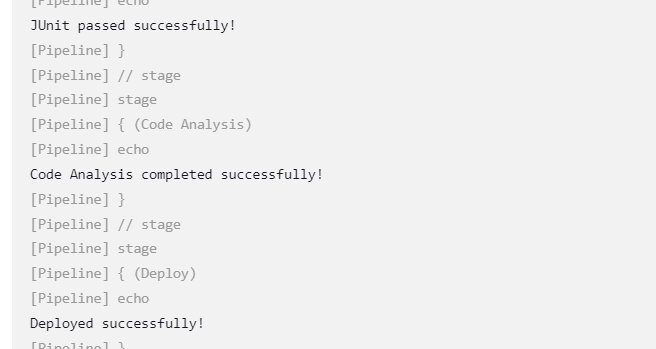
현재는 간단하게 각 stage 에서 echo 명령어를 통해 단순한 text를 출력하고 있지만, stage 항목에서 Git 에서 소스 코드를 가져오거나, 빌드 하거나, 서버에 배포하는 등의 작업을 진행할 수 있다.
결과
Script 추가
- post: 위에 pipeline 에 작성한 모든 작업이 완료되고 수행할 과정
...
  post {
    always {
      echo "This will always run"
    }
    success {
      echo "This will run when the run finished successfully"
    }
    failure {
      echo "This will run if failed"
    }
    unstable {
      echo "This will run when the run was marked as unstable"
    }
    changed {
      echo "This will run when the state of the pipeline has changed"
    }
}
결과

Jenkins Pipeline 프로젝트 - Pipeline Syntax 사용
Github 에 저장된 Script 실행
Jenkins 서버에서 외부의 Script를 가져와서 순서대로 실행할 수 있다.
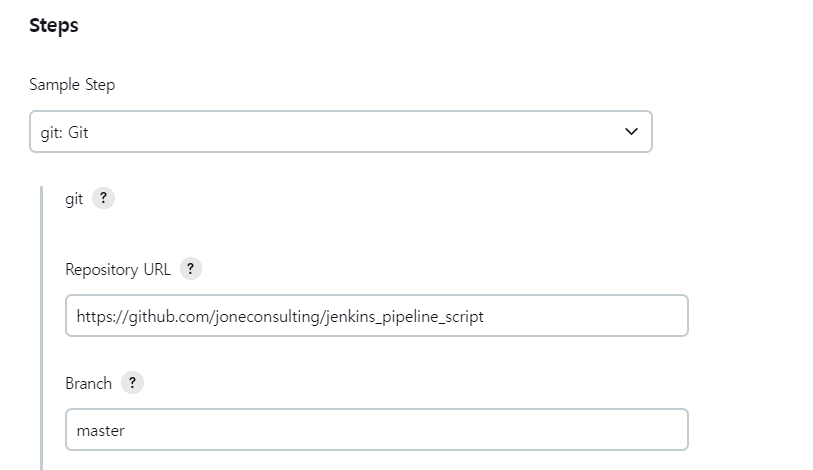
Pipeline Syntax 이용하여 Github Repository 에서 script 파일을 가져오는 코드를 생성할 수 있다.
- Item name: My-Second-Pipeline
- Pipeline: Pipeline script
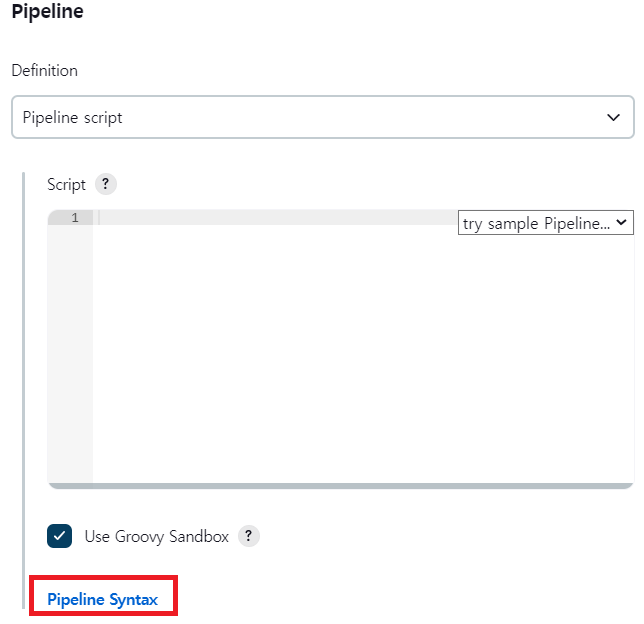
- Pipeline Syntax 를 이용하여 코드를 생성

pipeline {
    agent any
    stages {
        stage('Git clone') {
            steps {
                git 'https://github.com/joneconsulting/jenkins_pipeline_script';
            }
        }

        stage('Compile') {
            steps {
                echo "Compiled successfully!";
                sh './build.sh'
            }
        }

        stage('JUnit') {
            steps {
                echo "JUnit passed successfully!";
                sh './unit.sh'
            }
        }

        stage('Code Analysis') {
            steps {
                echo "Code Analysis completed successfully!";
                sh './quality.sh'
            }
        }

        stage('Deploy') {
            steps {
                echo "Deployed successfully!";
                sh './deploy.sh'
            }
        }
    }
}
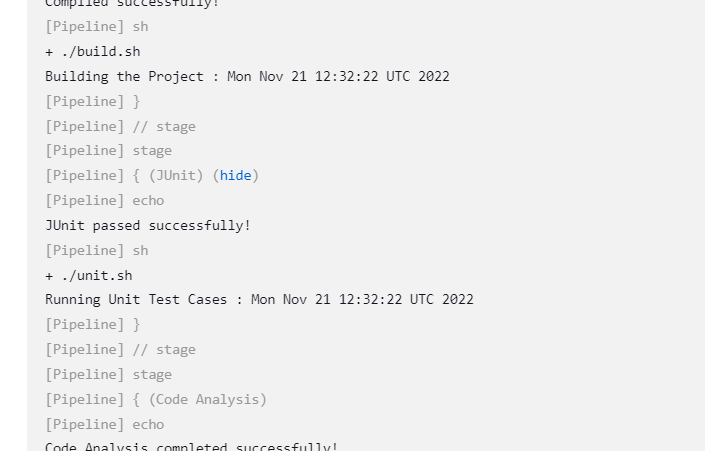
- sh 커맨드를 이용해서 Git 폴더에 포함된 스크립트 파일을 실행
결과

Jenkins Pipeline 프로 - Maven build pipeline
이전에 작업했던 cicd-web-project 예제를 Maven 빌드
- Item name: My-Third-Pipeline
pipeline {
    agent any
    tools {
      maven 'Maven3.8.5'
    }
    stages {
        stage('github clone') {
            steps {
                git branch: 'main', url: 'https://github.com/yoon-youngjin/Construction-of-CI-CD-Pipeline-using-Jenkins.git';
            }
        }

        stage('build') {
            steps {
                sh '''
                    echo build start
                    mvn clean compile package -DskipTests=true
                '''
            }
        }
    }
}
- tools: Maven 정보는 실제 Jenkins 에 등록된 Maven 정보
- Global Tool Configuration 의 Maven 에 등록된 정보
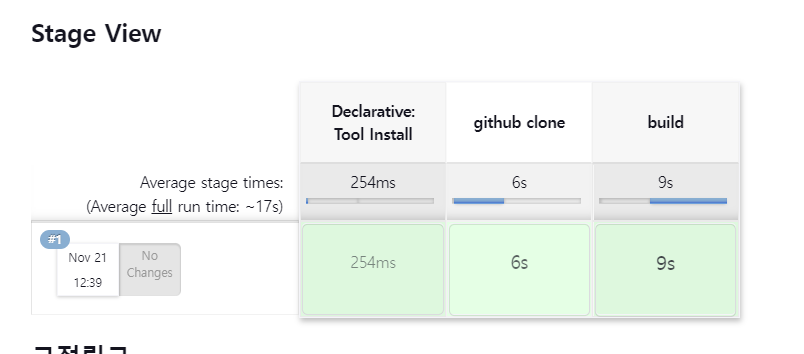
결과
Jenkins Pipeline 프로젝트 - Tomcat 서버에 배포
이전 작업을 tomcat9 서버에 배포하기
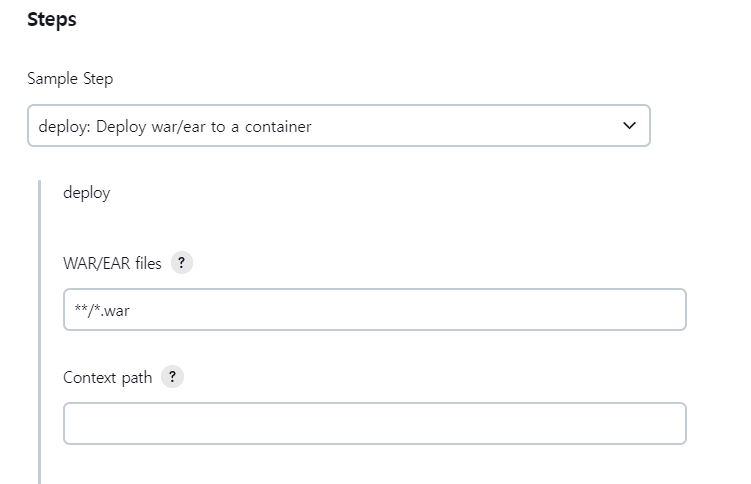
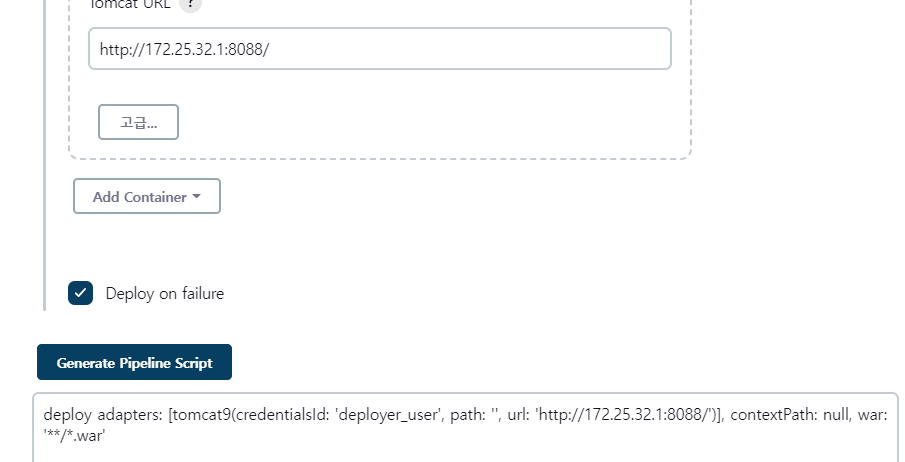
- Pipeline Syntax 를 통해 코드 생성
pipeline {
    agent any
    tools {
      maven 'Maven3.8.5'
    }
    stages {
        stage('github clone') {
            steps {
                git branch: 'main', url: 'https://github.com/yoon-youngjin/Construction-of-CI-CD-Pipeline-using-Jenkins.git';
            }
        }

        stage('build') {
            steps {
                sh '''
                    echo build start
                    mvn clean compile package -DskipTests=true
                '''
            }
        }
        stage('deploy') {
            steps {
                deploy adapters: [tomcat9(credentialsId: 'deployer_user', path: '', url: 'http://172.25.32.1:8088/')], contextPath: null, war: '**/*.war'
            }
        }
    }
}
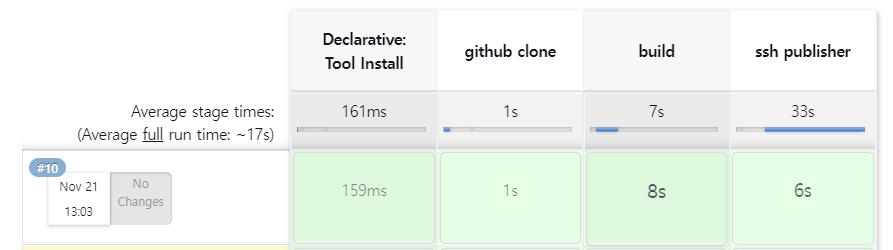
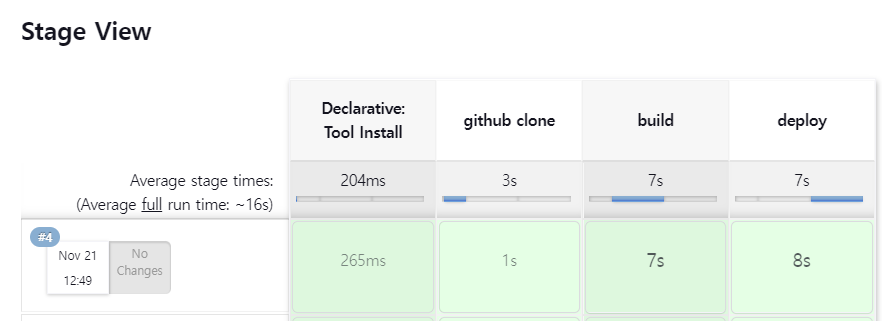
결과
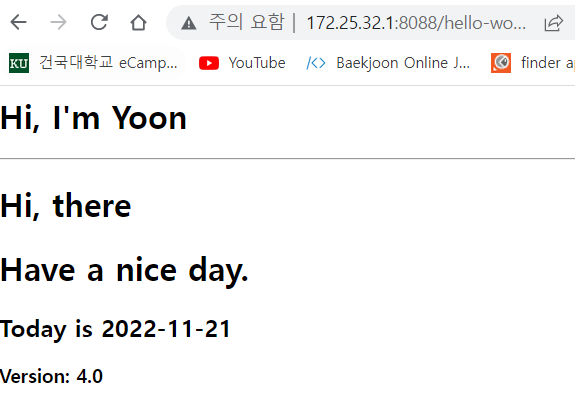
Jenkins Pipeline 프로젝트 - Docker 컨테이너에 배포
위의 결과물을 Docker Server 에 배포하기
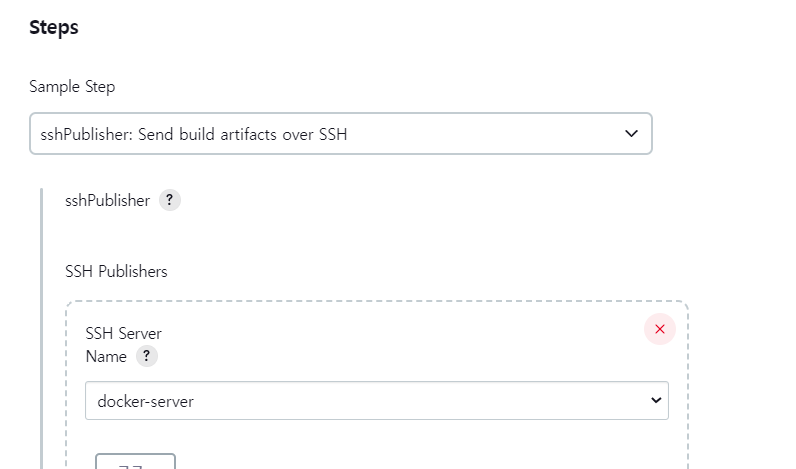
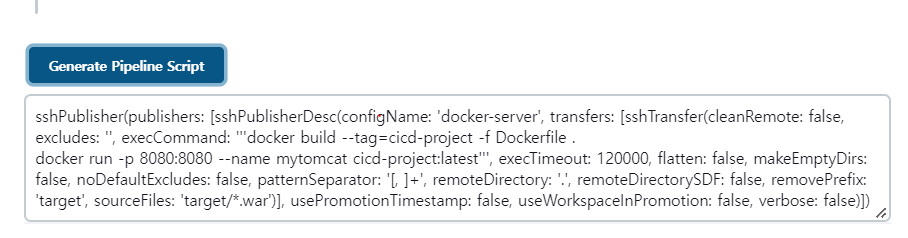
- Pipeline Syntax 를 통해 코드 생성
pipeline {
    agent any
    tools {
      maven 'Maven3.8.5'
    }
    stages {
        stage('github clone') {
            steps {
                git branch: 'main', url: 'https://github.com/yoon-youngjin/Construction-of-CI-CD-Pipeline-using-Jenkins.git';
            }
        }

        stage('build') {
            steps {
                sh '''
                    echo build start
                    mvn clean compile package -DskipTests=true
                '''
            }
        }
        stage('ssh publisher') {
            steps {
                sshPublisher(publishers: [sshPublisherDesc(configName: 'docker-server', transfers: [sshTransfer(cleanRemote: false, excludes: '', execCommand: '''docker build --tag=cicd-project -f Dockerfile .
docker run -p 8081:8080 --name mytomcat cicd-project:latest''', execTimeout: 120000, flatten: false, makeEmptyDirs: false, noDefaultExcludes: false, patternSeparator: '[, ]+', remoteDirectory: '.', remoteDirectorySDF: false, removePrefix: 'target', sourceFiles: 'target/*.war')], usePromotionTimestamp: false, useWorkspaceInPromotion: false, verbose: false)])
            }
        }
    }
}
결과